
Windows 11 requires an internet connection to finish the initial setup (out-of-box experience (OOBE)) for the Home and Pro editions starting version 22H2, but there’s a way to bypass the requirement.
Since Microsoft wants users to connect computers with a Microsoft account, the company has changed the initial Windows 11 setup to make it nearly impossible to continue configuring a new device or clean installation without an internet connection.
If the setup detects that the device doesn’t have a network connection, you’ll land on the “Oops, you’ve lost internet connection” page. If you click the “Retry” button, you will get a prompt to connect to the internet.
You could easily skip this requirement in older versions and continue offline with a local account, but this is no longer possible on Windows 11 22H2 and higher releases. However, for those who may not have an internet connection at the time of the installation or want a more traditional offline experience, there is a workaround to bypass the requirement and finish configuring the out-of-box experience without an internet connection, whether you are setting up Windows 11 Pro or Windows 11 Home.
In this guide, you will learn the workaround to continue setting up Windows 11 22H2 without an internet connection. These instructions will walk you through the steps to perform a clean installation, but the workaround also works when setting Windows 11 on any method that may require completing the out-of-box experience.
Important: This process will delete everything on your device. It’s recommended to make a full backup of your computer before proceeding. You’ve been warned.
Install Windows 11 without internet connection
To install Windows 11 (version 22H2 or 21H2) without an internet connection, use these steps:
- Start the PC with the Windows 11 USB flash drive.
- Press any key to continue.
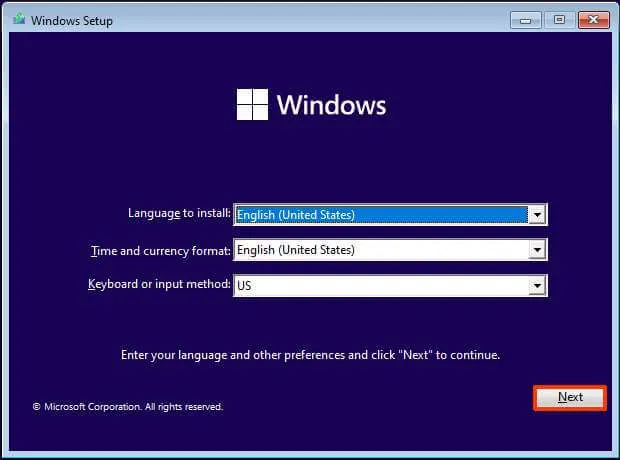
- Click the Next button.
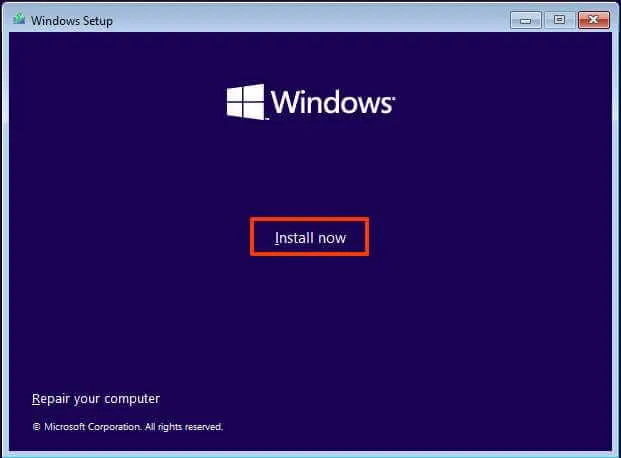
- Click the Install now button.
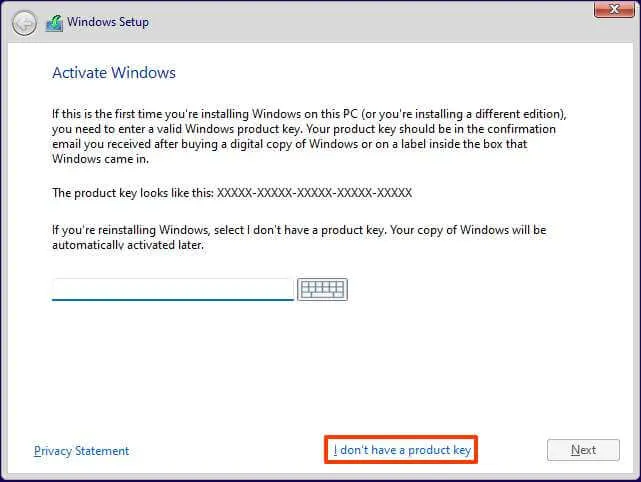
- Click the “I don’t have a product key” option if you are doing a reinstallation. If the Windows 11 installation were previously activated after the installation, reactivation would happen automatically.
- Select the edition of “Windows 11” that your license key activates (if applicable).
- Check the “I accept the license terms” option.
- Click the Next button.
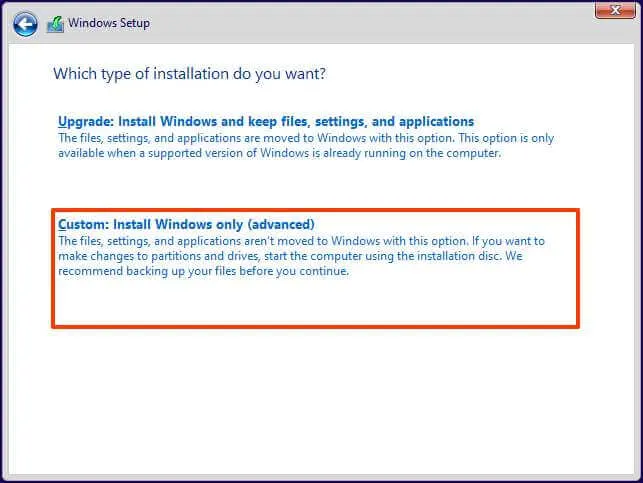
- Select the “Custom: Install Windows only (advanced)” option.
- Select each partition in the hard drive you want to install Windows 11 21H2 and click the Delete button. (Usually, the “Drive 0” is the drive that contains all the installation files.)
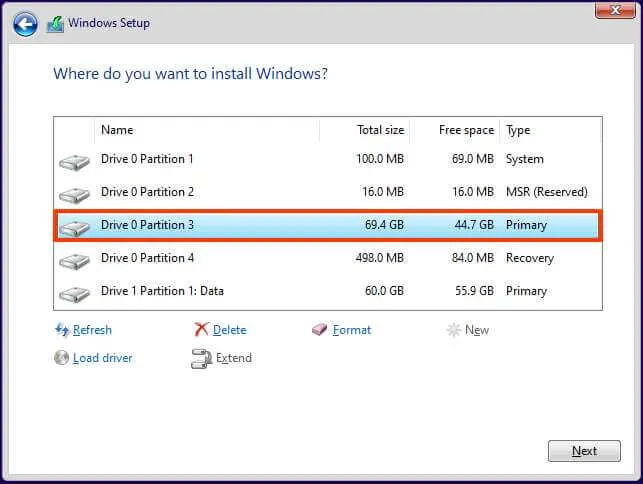
- Warning: Deleting a partition also deletes all data on the drive. Also, it is not required to delete the partitions from a secondary hard drive.
- Select the hard drive (Drive 0 Unallocated Space) to install Windows 11.
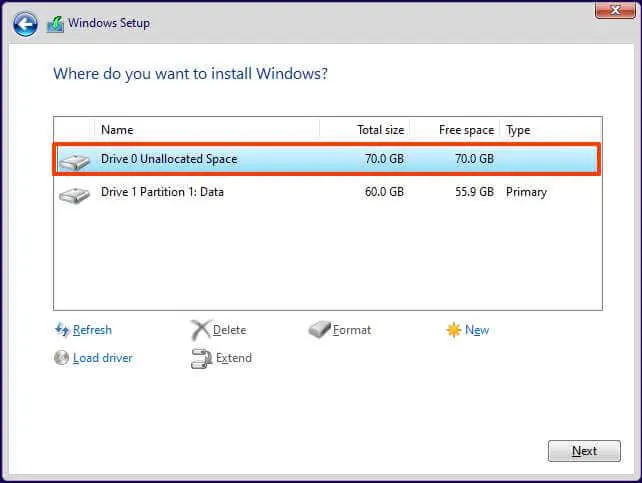
- Click the Next button.
- Select your region setting after the installation on the first page of the out-of-the-box experience (OOBE).
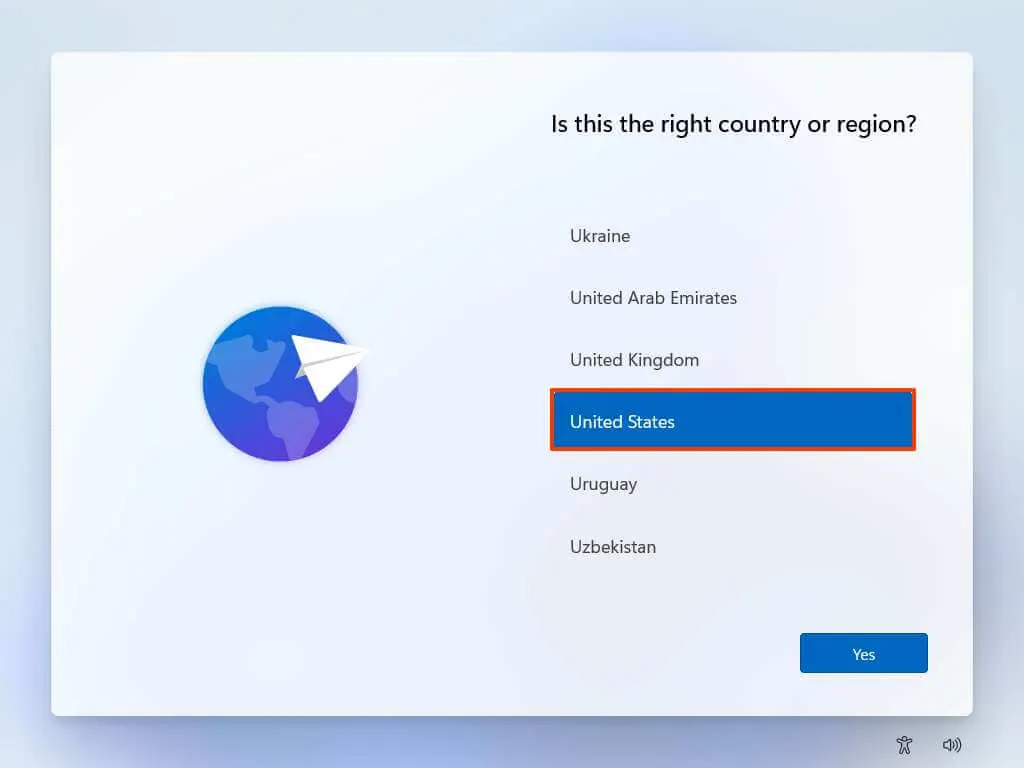
- Click the Yes button.
- Select your keyboard layout setting.
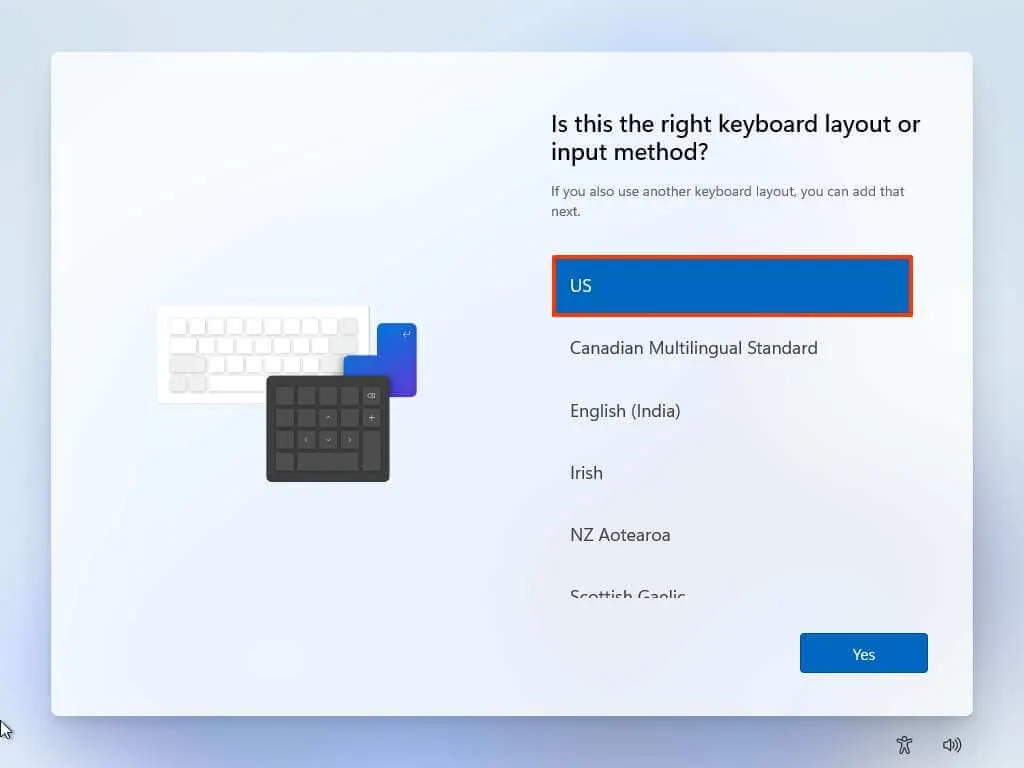
- Click the Yes button.
- Click the Skip button if you do not need to configure a second layout.
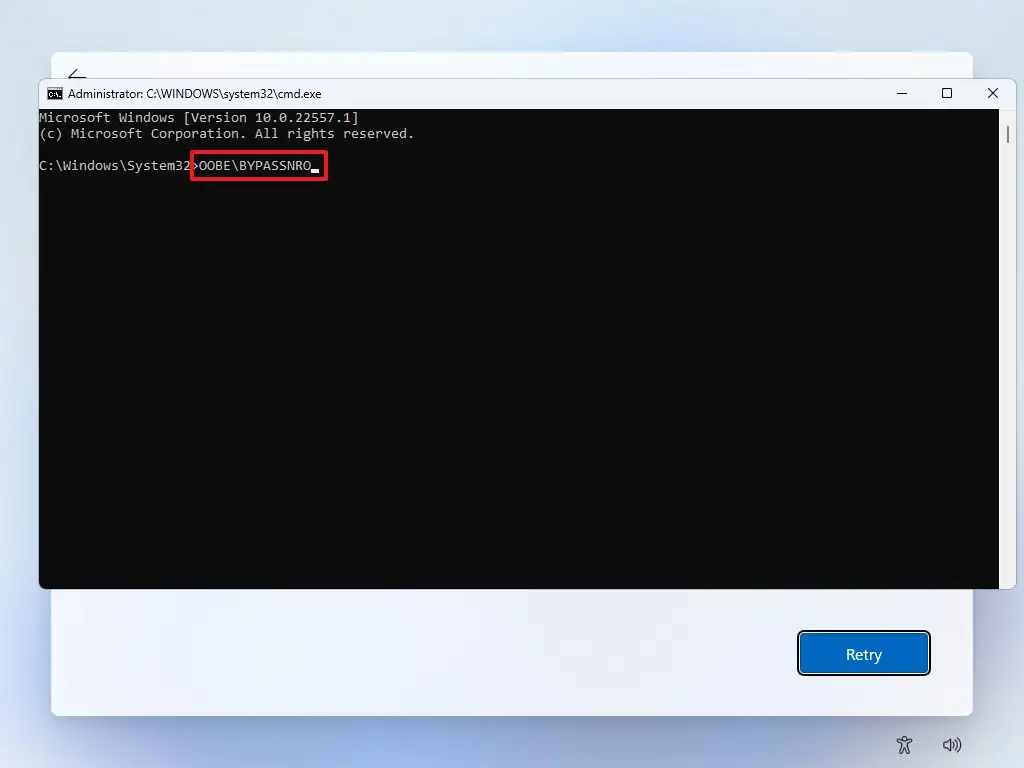
- On the “Oops, you’ve lost internet connection” or “Let’s connect you to a network”page, use the “Shift + F10” keyboard shortcut.
- In Command Prompt, type the
OOBE\BYPASSNROcommand to bypass network requirements on Windows 11 and press Enter.
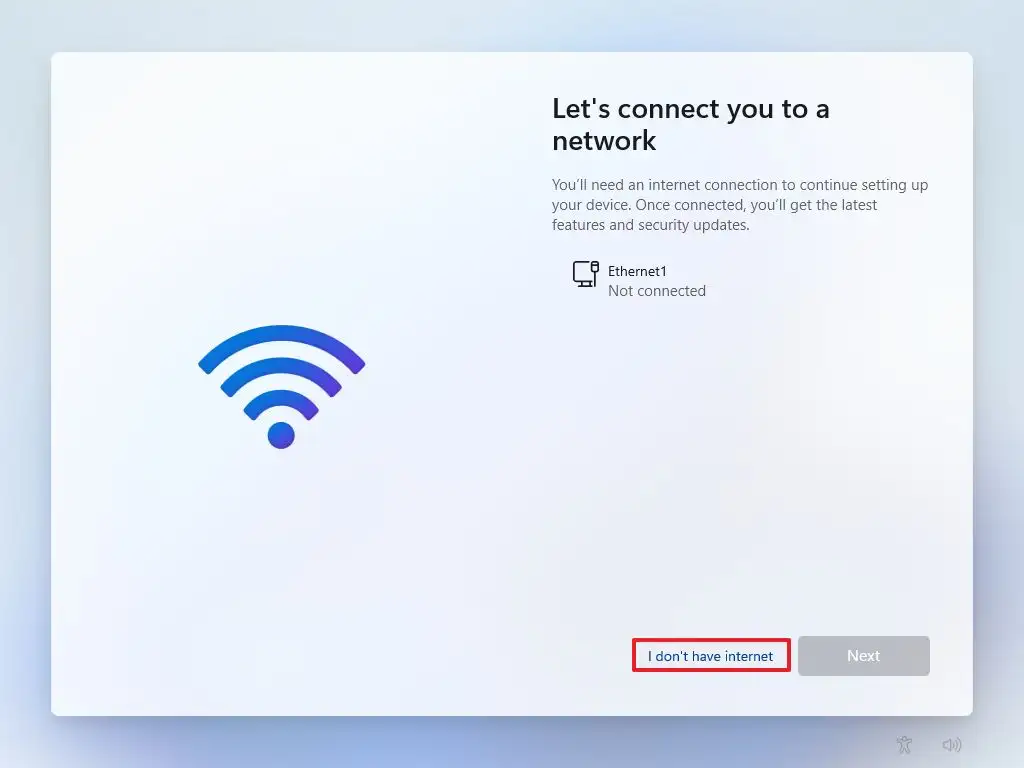
- The computer will restart automatically, and the out-of-box experience (OOBE) will start again.Quick note: You will need to select the region and keyboard settings again to get to the network connection page.
- Click the “I don’t have internet” option.
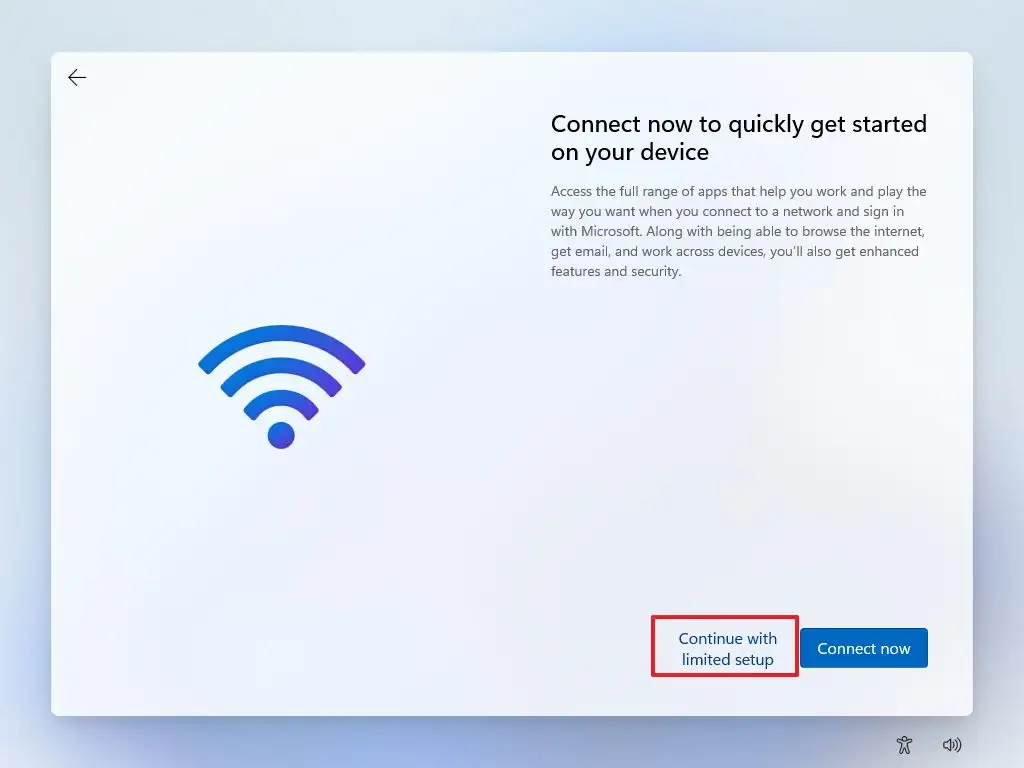
- Click the “Continue with limited setup” option.
- Click the Accept button (if applicable).
- Confirm the name of the local default account on Windows 11.
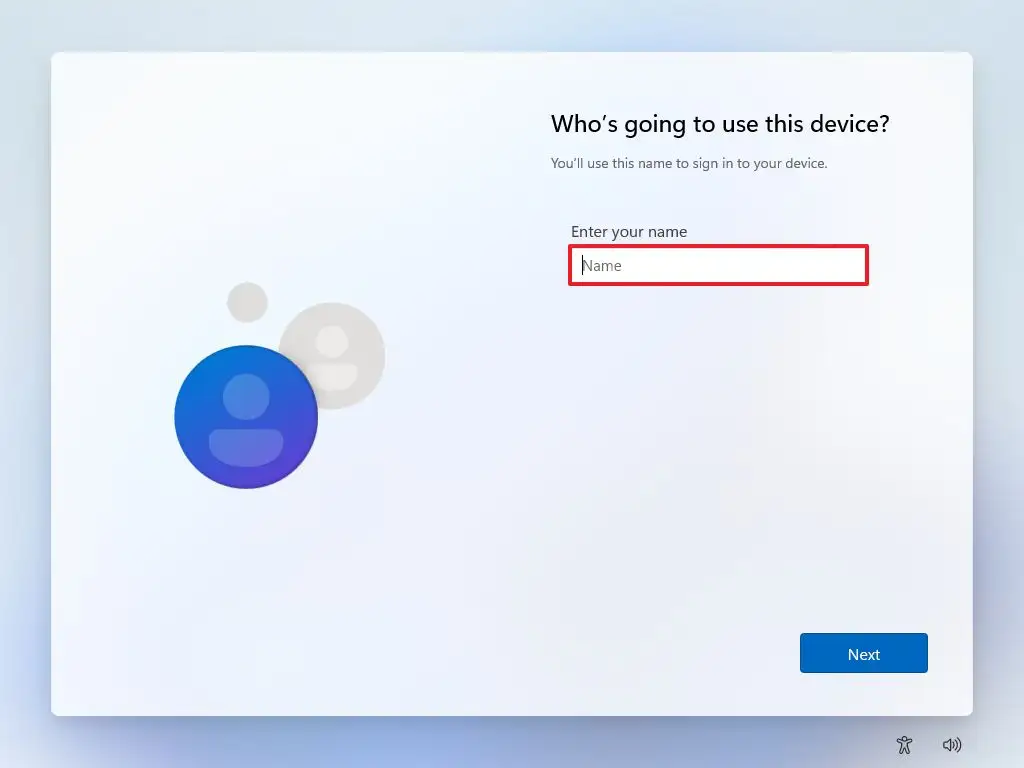
- Click the Next button.
- Create a password for the account.
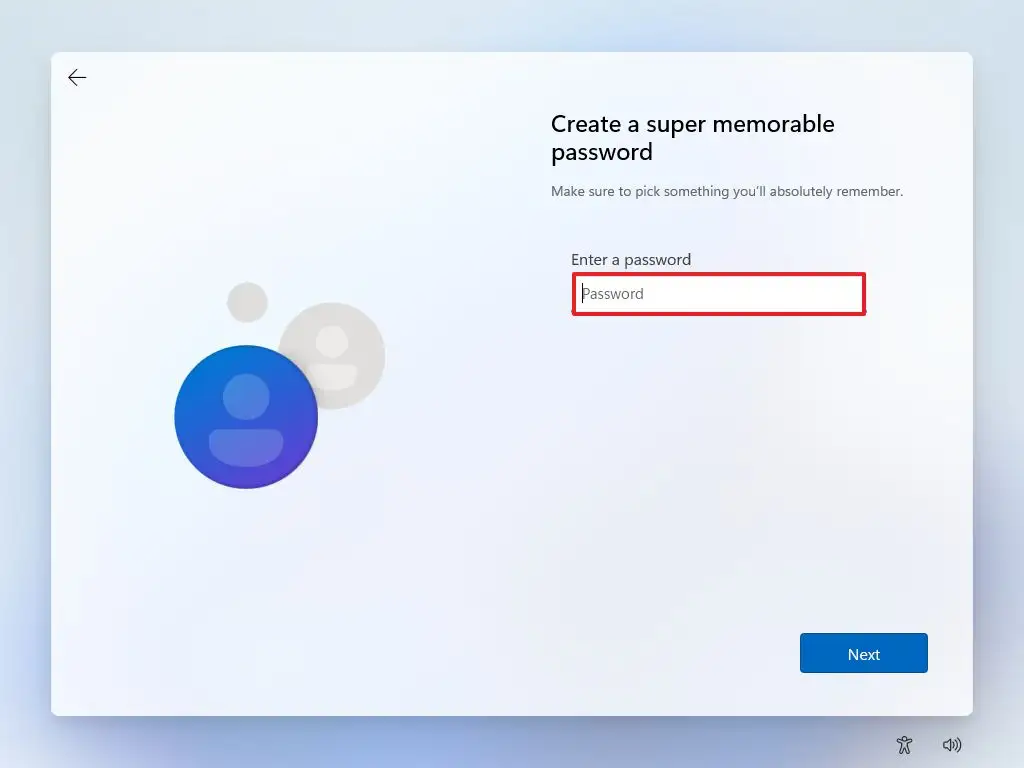
- Click the Next button.
- Confirm the account password.
- Click the Next button.
- Select and complete the three security questions to recover the account.
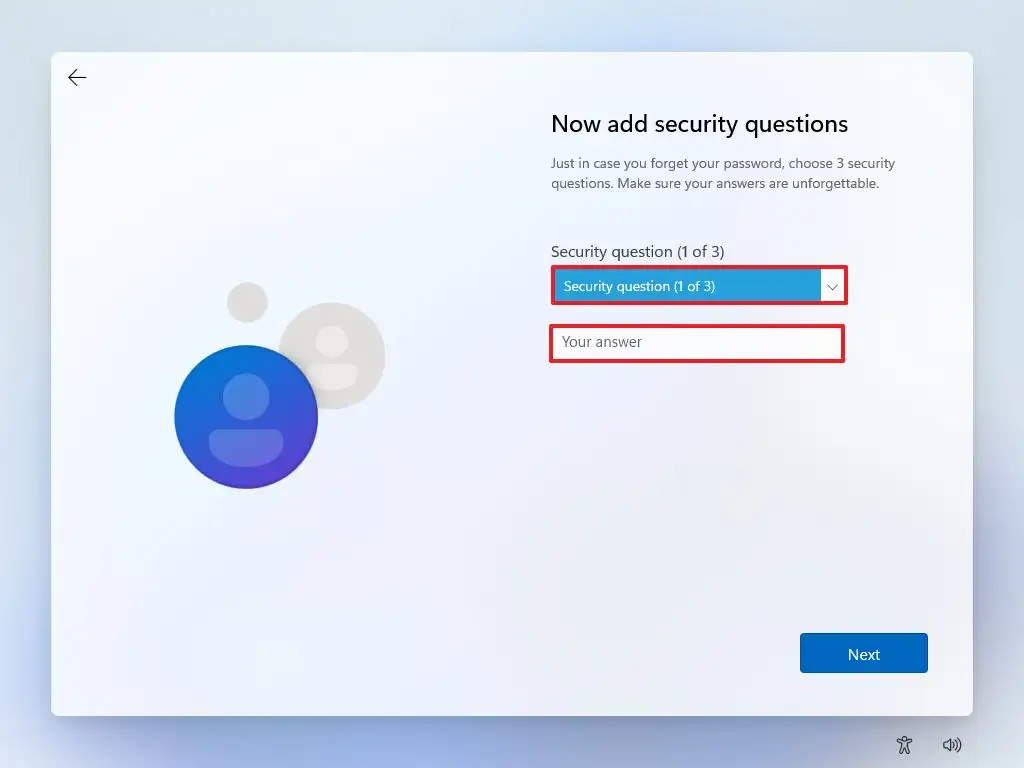
- Click the Next button.
- Choose the privacy settings.
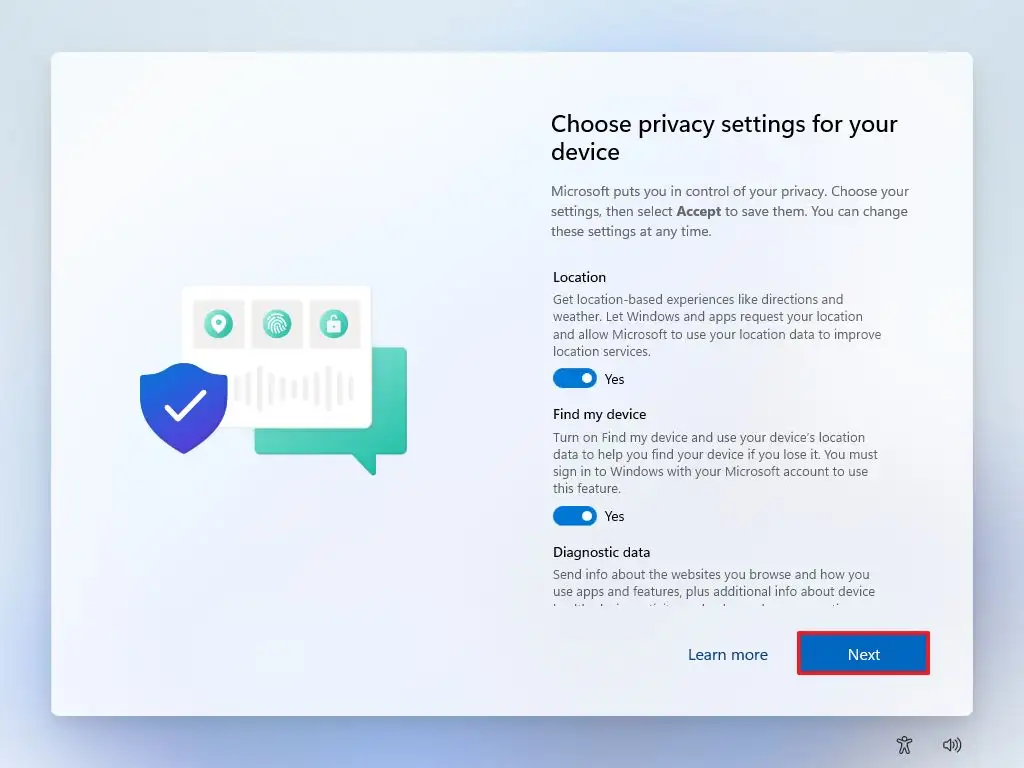
- Click the Next button.
- Click the Next button again.
- Click the Accept button.
Once you complete the steps, Windows 11 (version 22H2 or 21H2) will continue the installation on the computer.